Pages

Showing posts with label anatomy of a doll. Show all posts

Wednesday, March 16, 2011

Anatomy Of A Doll - Part 4 Finished

It's been a long time coming! This post is super photo heavy so I should have done 2 posts but I hope you will bear with me.

We last left the Elf with clothes but no hair. Here's what I did.

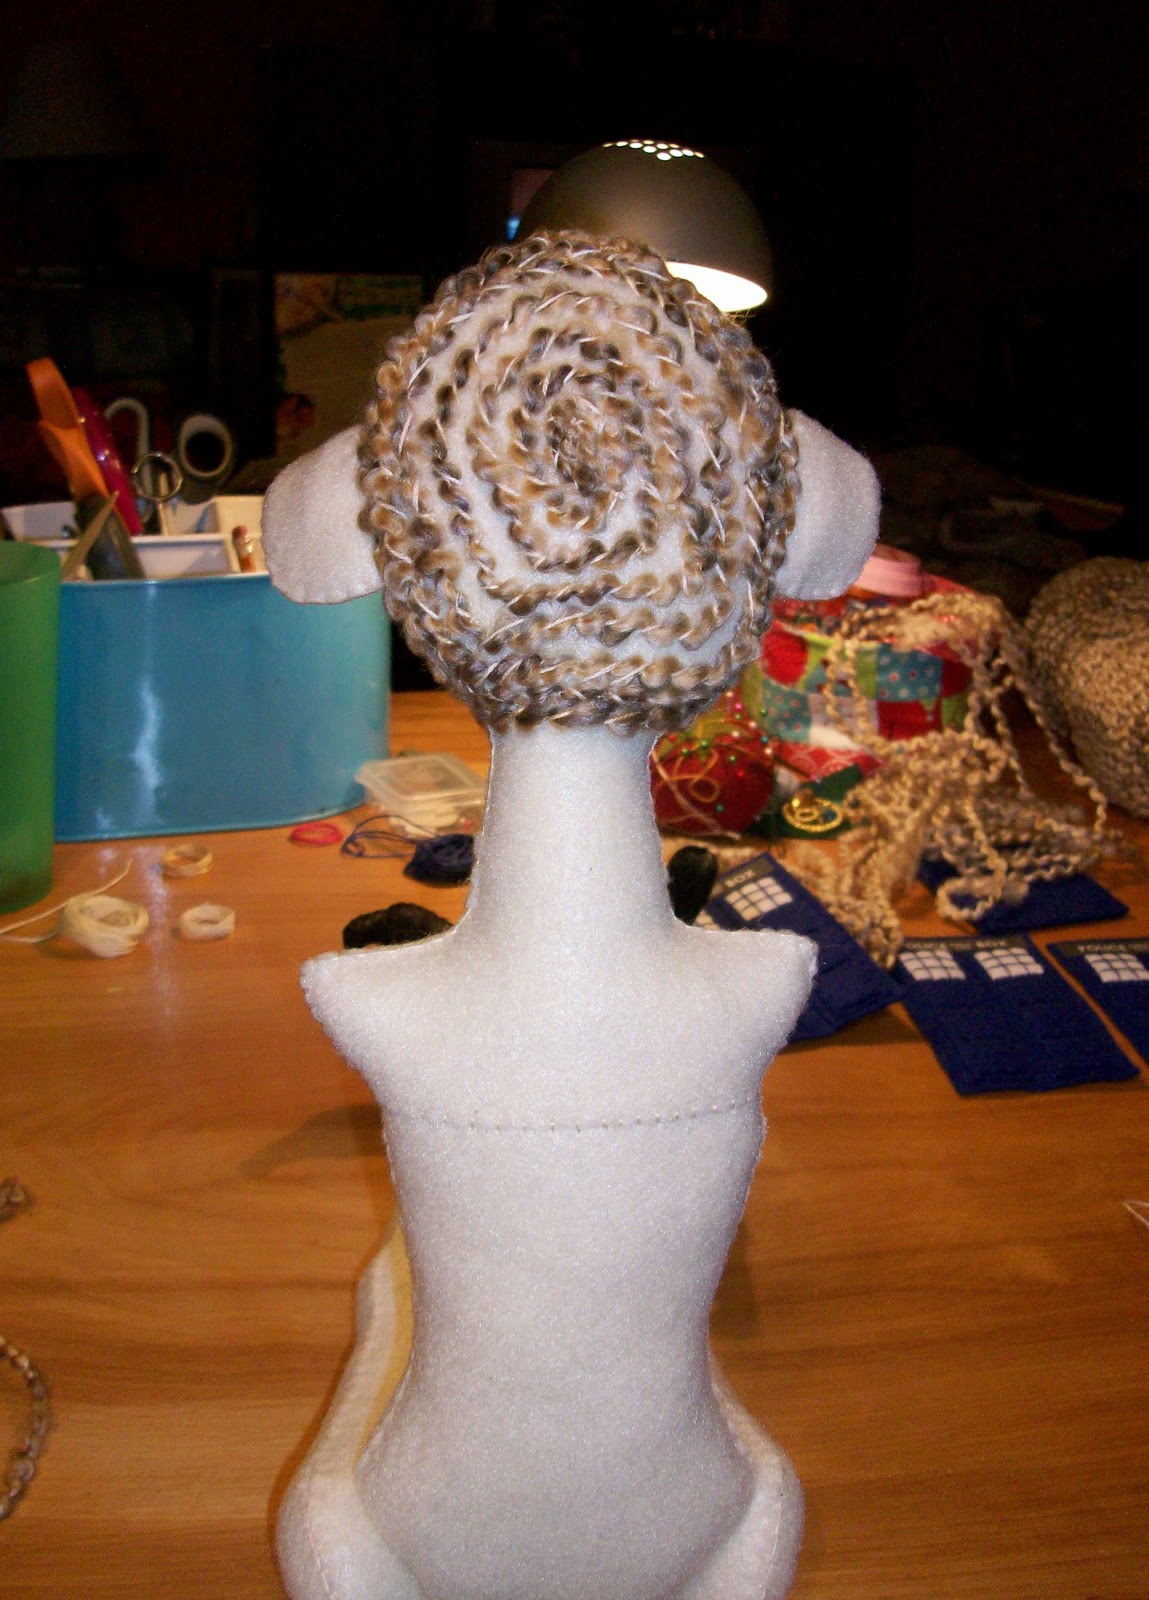
I started with a base of hair sewn on to cover a good portion of the scalp and add fullness underneath.

UPDATE: I added links to the bottom of this post for the rest of this series so you can follow along from the beginning.
 
I am going for a intricate braided look without braiding and making myself crazy. I worked late into the night to get this done. It took forever. I used Homespun Yarn by Lion. It's awesome.

Here she is almost done. You can see some gaps still. I added another thicker layer and was pretty happy with how her hair turned out.

I would have shown the finished doll much sooner but her cloak design was making me crazy. I tend to over think and analyze everything way too much before I just let go and do.

Her cloak is made of the same felt as her corset and is lined with a dark green fabric. I embroidered similar designs on the front and back of the cloak as on her corset.

There is a ribbon that ties the cloak shut.

Now you can see her with her arms on. I made her a beaded sort of crown.

I did embroidery detail on her arm bands too.

 Here's her hair completely done. 

Thanks so much to everyone who followed this doll making journey. For those of you who left comments, you are awesome and I appreciate that you took the time to do so. For those of you who lurked or dropped by I also appreciate you for being interested enough to take a peek.

PART 1 CAN BE FOUND HERE, PART 2 HERE and PART 3 HERE.

I have two more projects I'm working on but will only show bits and pieces here and there so I don't stress myself out over having to post progress.

Thursday, March 3, 2011

Anatomy of a Doll - Part 3

Well on to Part 3 of this series. I believe we were left with a limbless torso on Tuesday? In a Zombie world that would be great fun but not what I'm going for so here she is with limbs pinned on and naked. 
 If you are a long time follower then you know I tend to have naked dolls laying around at various times. I actually have about 10 right now. Not sure why I do that and the dolls certainly don't like it. Maybe it forces me to finally do clothes? Anyway when the limbs are on they will be button jointed so she can be posed somewhat and also sit.

UPDATE: I added links to the bottom of this post so you can follow along from start to finish. 

On to clothes. I had an idea in my mind based on my limited knowledge of how clothes are constructed and knowing where my strengths lay. A wonderful doll maker friend suggested that I use paper towels to fit the clothes and I've been doing that ever since. Saves messing up a lot of fabric!

Here I have the basic dress idea pinned together. Yes she is still armless. I find it easier to move the doll around without the arms on. They will be added last.

I dug thru my fabric stash and found this great green fabric but only had a fat quarter of it so couldn't do the wider skirt I originally had in mind but I like this one.
I was going to sew this on the machine but my hate/hate relationship with it came to a head and I almost through it out the window! So after I calmed down I hand-sewed the darn thing. I even put a lining in the skirt. So proud of myself!
Then I started on the top of the dress. Sometime after Midnight one night I decided to embroider it. I love embroidery but I don't really do embroidery. So this was just another new thing I pushed myself to do and I really like how it came out.

So now she's dressed and you've all caught up to me in real time. I need to do her hair and attach her arms and make a cloak for her cause well....Elves need cloaks. Yep she's an Elf and I couldn't be more pleased. Part 4 will continue next week and will be the final post on this doll. Thanks for sticking around and reading my ramblings.

You can find PART 1 HERE, PART 2 HERE and PART 4 HERE.

Tuesday, March 1, 2011

Anatomy of a Doll - Part 2

O.k. now where did I leave off? Oh yeah, so when the doll finally told me who she was I was able to start the details. By the way she told me she was either a Fairy or an Elf. I've never made either one before so I was excited to get going. I started on the ears. Both elves and fairies have pointy ears so if I changed my mind I was good to go anyway.

UPDATE: I added links to the bottom of this post to the other posts in this series so you can follow along from start to finish. 

 
 I wanted to be able to pose the ears so I sewed chenille stems onto the ear into the shape I wanted and it worked really well. It was the first time I've done something like that.

I played around with ear placement for a while then got to sewing.

Here she is stuffed with her ears on. (Oh that sounds like some gross taxidermy experiment!) Majorly in love with her eyes.

Next I did her hands. This is the very first time I've done hands with fingers. I was really nervous but very pleased with how they came out. My doll hands to date have been a variety of paddle shapes and recently a square hand with a thumb as show below.

I thought I had a photo of me doing the hands but I don't. I wanted to be able to pose the fingers and bend the arm so I did a pitchfork type of wiring that seems to work just fine.

Again I used chenille stems then stuffed the fingers carefully. This is all a first time learning process for me.

Next the legs. Remember that great leg and boot? Well I'm not sure if it was the design or the embossed felt I used but the boot came out so skinny. 

Not real pleased with it but decided to add a sole and the bottom of the heel to give it some weight which helped a little. Loved the snakeskin felt for the boot so decided to use it anyway.

Oh remember my idea for the more natural breast? Yeah it's more like a boy chest than what I was going for but it's fine for this particular doll. (have to give the design more thought)
Thanks for reading along today. Hope you are enjoying seeing what I'm doing as much as I'm enjoying trying new things.

You can find PART 1 HERE and PART 3 HERE and PART 4 HERE

Monday, February 28, 2011

Anatomy of a Doll - Part 1

UPDATE: I've added links to the bottom of this post so you can follow this series of posts from start to finish. 

I decided to do this in case anything I say is helpful in anyway to some one interested in making dolls. Also if any established doll makers see this and want to leave me any tips based on what they see me doing, that would be most welcome.

So I'm new at art doll making. At least I consider this an art doll, but I guess that's subjective. I've been making plush dolls for a while now and this seems to be a natural progression for me. Anyway the doll I'll be showing here is a completely new body design from what I've done before. She is also a mishmash of techniques I've learned or taught myself up til now.

So I started by making a paper pattern. I found a great leg pattern in Soft Dolls and Animals Magazine and built the body pattern around the leg. The leg had a great boot design.

The torso and head are separate because I was trying to find a way to make more realistic breasts. This only partially worked as you'll see later.

I have a love of big eyed dolls like Blythe and Pullip so played around with some faces and decided on this basic face design.

This face is also reminiscent of my daughter, all big beautiful eyes, little nose and full lips.

Next I gathered up my supplies. In case some of you don't know I hand sew my dolls. They are also made of eco felt, a felt like product made from recycling water bottles. I love that I'm using a useful product that was made from something so many people just throw away. I love the way it feels and it's very durable and comes in lots of bright fun colors. Another reason I use this felt is that I'm severely allergic to wool. I buy my eco felt from Felt O Rama. They sell it by the yard and their customer service is outstanding.

 Sometimes I specifically know what the doll is that I'm making from the beginning. But not this time. I originally was thinking of making a Steam-punk doll or Costume doll for one of the ADO challenges. She took a while before she told me who she was then I was able to design the rest of her from there. She sat around as a disembodied head for a while until she decided.

I don't paint my dolls faces. Although I could paint on the felt I'm not real confident in my abilities there and since I know my felt that's what I do. All my details are hand drawn on paper to fit the needs of the doll.
The eyes, nose and mouth all have dimension to them. She looks a bit weird all flat like this. Hope I haven't bored you to tears and that you'll come back tomorrow for more.

Anatomy of a Doll PART 2 can be found here. 
PART 3 HERE and PART 4 HERE

LinkWithin

Blog Widget by LinkWithin