Running Easter Bunny Felt Plush Pin
I designed the cutest little running bunny pattern for you guys! Perfect to wear for Easter.You could also turn this into a hair clip.
Supplies:
- Polyfill stuffing
- Embroidery thread in color of your bunny (I choose brown)
- Pink embroidery thread (for feet)
- White embroidery thread (for bunny tail)
- Embroidery needle (my preference is #5)
- Sharp scissors
- Felt in white, brown and pink (not shown)
- 1-1/2 inch pin back
- Hot glue or craft glue (optional)
- Packing tape (felt crafter's best friend)
- My pattern available below.
After you gather your supplies, download pattern page.
Cut out pattern pieces and pin to felt. You can also just trace around pattern pieces lightly with a pen. See below for how to cut the toes out.
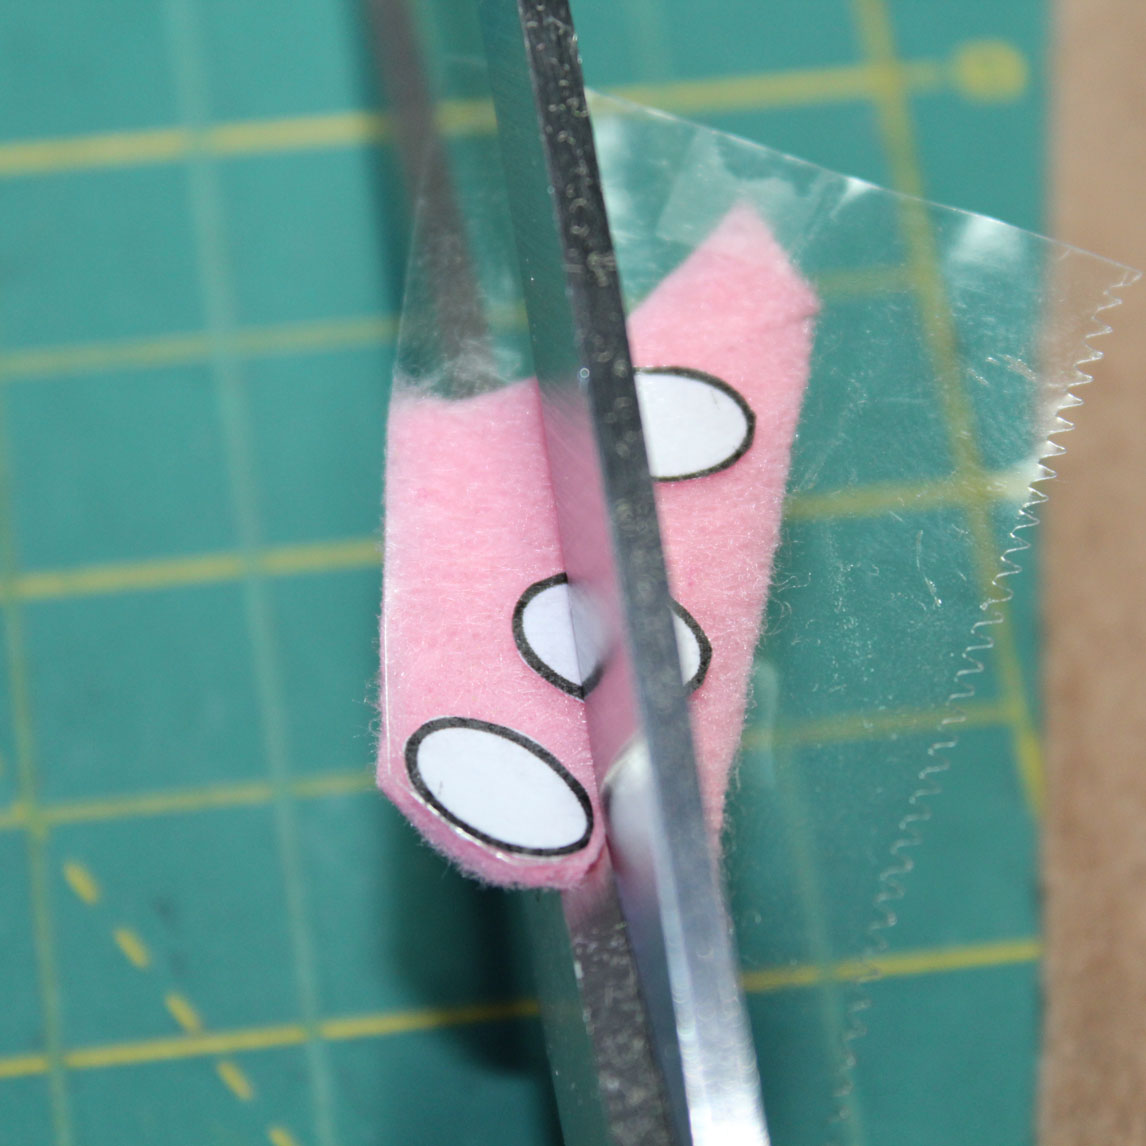
Here's a nifty trick for cutting small pieces from felt. Place the pieces on the felt and take a piece of packing tape an press over where you are going to cut.
Now cut around the shape. The tape holds everything nice and secure.
And there it is, cut perfectly, no stress and ready for the next step.
Next sew on the foot pads and toes. This might me too fiddy for some people so it's perfectly fine to whip out the craft glue and glue those suckers on. (I'm just obsessive about stitching things so that's how I'm showing it done)
Start lining up the bunny pieces with the solid back piece.
After everything is lined up pin head and feet to body.
Using a running stitch attach head where the body overlaps. Then attach the feet where they overlap the body as shown above.
Now we are ready to make the fluffy tail. Cut the 2 circles from the pattern out of white felt, Carefully make a series of cuts from the outside of the circle to the edge of the gray inner circle (don't cut into the gray circle).
Cut in even intervals all the way around the circle. Do this on both circle pattern pieces.
Place the smaller circle on top of the larger circle and sew a quick running stitch in a circle, attaching the 2 together and to the bunny body. Ruffle and squish the tail till desired fluffiness is achieved. You could also sew on a cottonball if you prefer.
Turn over the solid pattern piece, position the pin back and sew. Tip: open the pin to make sewing easier. You can also hot glue the pin back on instead of sewing.
Line up front and back and blanket stitch starting at right side head. Work around to the left.
Once you sew all the way around the head stuff the ears and head, then continue to sew around body to feet.
Stuff left foot and continue to sew around as shown.
When you get to the right side, stuff right foot and then stuff bunny's body. Finish sewing closed with blanket stitch.I stuffed my bunny very full but you could lightly stuff for a flatter look.
Almost done! Hmmm, needs something. How about a ribbon?
There we go, how cute is that?! All done, great job you guys!
My lovely mom posed for this photo for me.
If you make this pattern please tag me on Instagram @sassypackratstudios or on Facebook as Sassy Packrat Studios. I'd love to see how you did. If you have any questions about this pattern, please ask and I'll be happy to answer.
I also have free patterns that are completely different from the ones I share on my blog just for my email subscribers. They are having a party over there, come join us! Click here to subscribe!


1 comment:
Another cutie from the imagination of Jennifer !!! Love it!
Post a Comment